Projects
Here will be custom projects I worked on an still workin on.
Some projects will be music, science and technology orianted.
The Bubble light pc case mod.
Heres a project im workin on that will turn those boring Bubble christmas lights into a nice effect that you can place in or on your box where ever you feel. 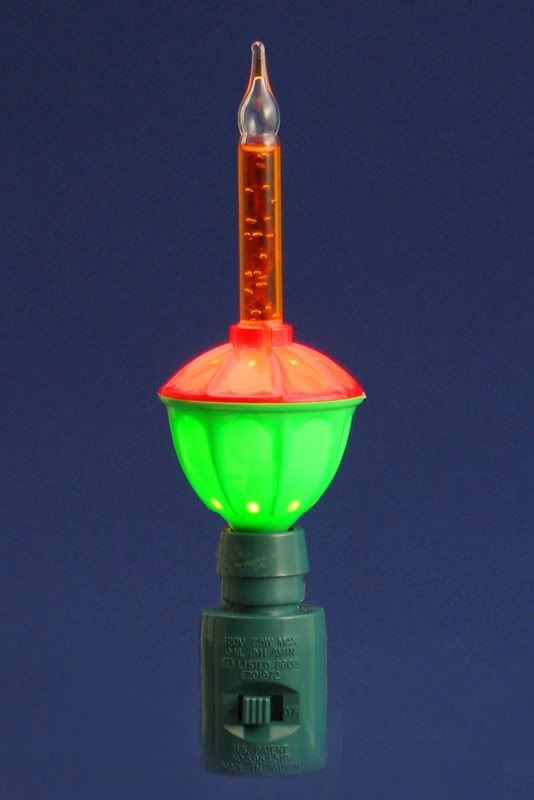
Here will be the challange. Remove The inner bulb. We dont need it. To do this grab some news paper and a pianters mask (A dew rag will work also) Dont forget your goggles. Glass will fly!The Mask is for protecting your lungs and your nose.
1. Grip the light by the green and red plastic shield. Use a pair of pliars to first crush the
threads and twist slowly. The bulb inside will break. (NOT THE BUBBLE STEM!) This is were the masks come into play. When I did this a fowl odor was released. I
assume its some type of gas. And take extra caution with older bubble lights. Who knows
what kind of gases were used when they were assembled.
2. After breaking the inner bulb there will be allot of shards left inside. Shake it so the pieces fall out the hole were there threads used to be.(I hope you laid down your news paper.) You may want to use an instrament of some kind to break the shards even further(SCREW DRIVER) because some shards will be to large to fall through. BE CAUTIOUS NOT TO BREAK THE BUBBLE STEM. THAT STUFF IN THERE SMELLS NASTY AND IT STAINS!
3. Once all glass is removed from inside, we remove the bubble stem. Get the plastic of how ever you see fit. If you look at the bottom of the stem were it enters the plastic, there are four raised brasers that are glued to the stem to secure it. Those might brake off and remain on the stem. This proves to be a hassle. But you can do it. Use a lighter to BRIEFLY heat the plastic. ( Long Exposer to flame will cause the stem to explode.) The plastic should come off with little force after heating. But don’t force it. Just heat agin.
4. Assuming that you now have the bubble stems them selves, we can move on to the white Christmas lights. 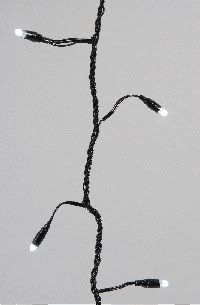
Cut two lights per bubble tube.(leave slack on wire to work with) With my set up ive used 4 bubble stems. So that means I have to have 8 white Christmas lights.
5. Grab a usb backplate. 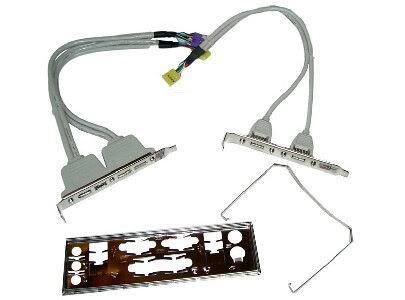
 (or similar device) cut the usb hubs off. (NOT THE CONNECTORS FOR THE BOARD CONNECTION) Ok, now all we need are the red and black wires. 2 lights per set of wires. add a transitor to limit voltage. A switch is cool but not needed.
6. Each set of lights needs to be under the freed bubble stems. Remeber 2 lights per stem. 2 lights per set of wires. So be creative when mounting. Since everyone doesnt have the same box I cant tell you where or how to mount. Once you find a good spot for a mount plug in the lights on the mother boards usb connection.

ATI Radeon 9000 9500 9550 no fan to fan mod
1. Find a heat sink fan from a Pentium 3. Similure to this one
 There realy cheap and in many cases you might be able to get one free. Many people around this time of the gift giving year get new pcs and through out there old ones (after gutting) Ive found many outdated pc's in the garbage. I mostly poke around in them for fans, leds and semingly usless pieces. (I have a few Pentium 3 heatsink fans that ive recovered.
If its a stock fan and heatsink then unscrew it from the heat sink, wich is screwed directly in the heatsink it self. (do you see were this is going?)
2. Take your card hold it long ways by the pci sheild and postion it over the heatsink so it looks like a diamond aginst the heatsink. heres a pic to demonstaright.

The fan doesnt fit perfictly over the heatsink. Thats why I said use a "Diamond Configuration" Cause u at least need two screws to mount this securly. So if you use only one dont complain about problems.
3. Use the screws you have the left over from the unistalltion of the fan. These screws fit perfectly in the ATI's heat sink grooves. (the Top and Bottom srcrews are needed the left and right screws u can disscard.)
4. Lastly, Hook the fan into a 3-pin power conecton and your ready!
I would post a pic but i dont have a good enough digi. So sorry for the doctored pic above... Ill try to barrow my buddies and upload later if needed.
This works great for cooling and overclocking!.... Give it a try and tell me what you guys think.
A plant study
After getting a bachlors in botony, I decided to explore the underbelly of horticulture. I travled mostly in eruope but I did stop in parts of asia.
The main reason for the trip was to learn about plants that I didnt have access to here in the states. "What types of plants?" you may ask. Well honestly... Marijuana, ibogaine, poppies and other types of roots and plants that affect the body in such extreme ways.
For six months or so I sort of apprentaced at the The Hash Marihuana & Hemp Museum in Amsterdam. I didnt go there to work I just sort of fell into it after talking about my interests in all feilds of horticulture. I learned so much there that I was alowed to conduct a small experiment at there expence! Well I more or less helped. I was involved in pollinating a new strain of marijuana at the time. A version of buddas sister & skunk #5. This was a plant that was aim to produce hashish only. They even let me cut and plant some clones.
This is were the project comes into play. The processes I witnessed were so easy, I had to give some instruction. Different methods were used. Screens, Butain, bubble bags and finger pressed were all used to evaluate THC loss throught processing.
So if you smoke weed this might be of some use to you.
This is only intended for larger amounts of marijuana. at least 1.oz
The easyest and cheapest way is to get some panty hose. We didnt use panty hoes per-say but it was Nylon. You need Two panty hoes. Now find a small wood box or a tin. Stretch the panty hose over you box or tin so its tight but dont rip it. Tie the access into a knot at the bottom so i wont retract and become lose. now do the same with the other Panty hoe. Now take your bud and grind it up. Not to fine. Just enough to break it up. Now dump it on the the nylons and smooth it over the top. Now starting from the middle of the nylon, start tapping it GENTLY. You dont want this thing to become a trampoline and fling your weed around the room. after about 5 to 10 minutes scrape the weed off into a bag or were ever. You can still smoke it!....
Left over in the tin or box is whats called Kief. Kief can be smoked as is but burns to fast and is not very rewarding. So we make hash! Take your kief and pour it into a sellifain bag (ciggaret wrapper) and press it down lightly and the roll it up long ways. Make it as tight as possible. Tape it with some scotch tape so it wont come undone. Now wrap it in news print paper remembering to keep it tight. Also tape it. Now pre heat your over to about 300 to 325 degress F. While the oven warms, thorughly moisten the news print paper. Soak it! we dont want it burning.
Once the ovens heated. Place your little package on a cookie sheet and put it in the over for 10 to 15 min. While your waiting find a solid cylinder of some type a rolling pen, metal bar or somthing similar.
DING! its time to take it out of the oven. Use a oven mit and quickly take it to a flat level surface. I use the kitchen floor so I can just take it right from the oven onto the floor. Use your solid cylinder to roll it, roll it and roll it untill its as flat as its going to get. About 5 minutes or so.
Now un-wrap. a box cutter works great to cut the tape of. What you should have is a flat block of hash!
